During the first two years I owned my ’95 YJ, I put on nearly 5000 highway miles. That’s not much for a normal family car, but keep in mind that a YJ is a purpose-built vehicle, and that purpose is not highway travel. The manual throttle control for a rolling box like that is less than enjoyable on long road trips. On our Fourth of July trip to Wyoming this summer (’97), my right leg got so sore from maintaining constant pedal pressure that I could hardly stand the pain.
Anyway, in August ’97, I finally broke down and bought an aftermarket cruise control unit from JC Whitney. I got lucky–their cheapest model was on sale for $70 down from $90. This is the Equus unit, which was also available from 4 Wheel Drive Hardware. Even during the UPS strike, the unit took about 10 days to ship, just like they said it would. When installing this unit in a YJ or TJ, you shouldn’t need the extra $10 clutch switch. I ordered one, only to find later that I didn’t need it. If it turns out you do need one, I’ll cut you a deal on mine. Update: I’ve been told that Equus stopped making cruise control units around 1998 or 1999, so the unit I have is no longer commercially available. Most of the info on this web page should be generic to other models, though.
The installation of the unit was pretty straight forward. It took about three hours, which I spread out over three days, partly due to my lack of a lit garage, and partly due to my stupidity. Tools needed were:
- Utility knife
- Electrical tape
- Pliers and/or vice grips
- Phillips-head screwdriver
- Flashlight (for working under the dash)
- Power drill & 7/32″ bit (for mounting the servo on the fender well)
- Optional but recommended: 5/16″ & 11/32″ socket drivers
The instructions provided are pretty good, so I’ll only point out the differences here. The numbers in brackets are the page numbers from my factory service manual that refer to the various components or wiring diagrams.
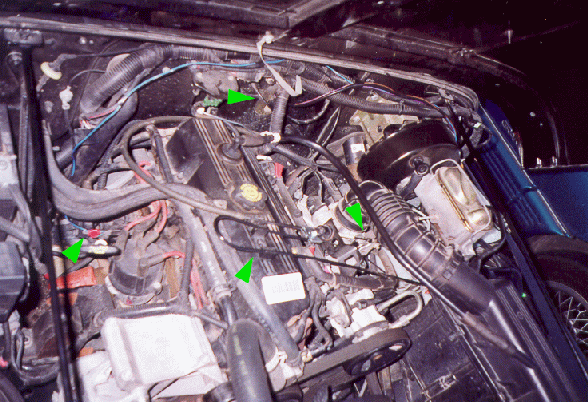
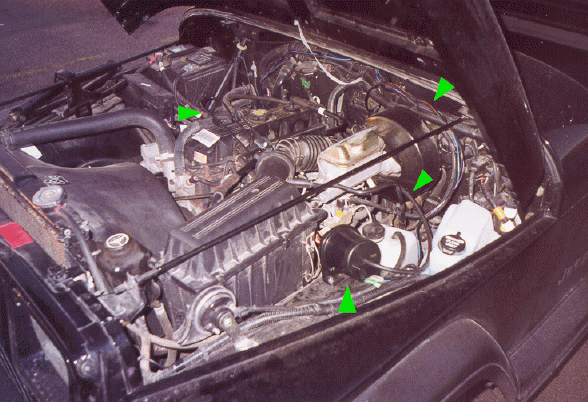
The vacuum hose was easy to do. I bisected the big rubber line running between the intake manifold and the brake booster, inserted the little T-connecter they provided, and plugged the new vacuum hose into it. It took a bit of shoving to get those T-connector ends into the main vacuum hose. The T-connector adds about an inch to the length of the main hose, so you may want to remove an inch or so from that hose before inserting the connector. I didn’t bother, since there was still room for the extra hose length. [5-25 to 5-27]
The throttle control linkage was pretty simple once I figured out what parts I needed. (Equus provides connectors for several different throttle configurations.) I placed the servo on the driver’s side fender well just in front of the radiator overflow and wiper fluid containers. The “nose” of the servo points sideways, directly toward the engine. (Don’t permanently mount the servo until you’re sure everything works!) The throttle control cable runs just behind the air filter box to the top of the engine, clips into the same bracket as the existing throttle cable (by the oil fill cap), makes a 180 degree turn, clips into the bracket again, and finally heads down to the throttle control near the intake manifold. The sharp turn in the cable bothered me at first, but it doesn’t seem to have any adverse effects on the cruise control operation. The new cable is clamped to the old one with two metal plates screwed together. The end of the new cable goes through a hole an existing bracket right next to the old cable. The throttle linkage I used was the short wire loop. I removed the primary throttle connector, put the loop around the little ball, and replaced the other connector.
The wiring is what caused me the most grief. First, the short, black ground wire from the servo should be connected to the ground screw in front of the horn, by the headlight. All the other wires should be tied together (electrical tape works well for this) and run back to the firewall and over to the top center of the firewall.
The blue/black wire pair should be run all the way across the top of the firewall and down beside the battery to the ignition coil. The coil is a 2x2x3″ box with two wires coming out the front. Using one of the red wire splices provided with the kit, you need to splice the blue wire from the kit into the gray (not green) wire from the coil. Since the fancy connectors at the end of the blue & black wires won’t be used, I wrapped them in electrical tape to prevent shorting. Make sure you fasten the wires up with the existing wires so they don’t lie against the engine. I used lots of electrical tape during this entire installation! [8D-22, 8W-30-2, 8W-30-12]
Just to the driver’s side of center and about six inches from the top is a large, rubber grommet through which a large clump of wires runs through the firewall. This enters the cab just above and to the right of the accelerator pedal. All the remaining wires from the servo need to enter the cab through this grommet. I ended up cutting a new hole in the grommet with a utility knife and pushing the wires through with a screwdriver. Be sure to keep the hole as small as possible, and you might consider caulking around it to maintain water resistance.
Green arrows in the above pictures point to items that I added or modified during the installation.
Inside the cab, you need to connect the red fused power wire to somewhere that’s only hot when the ignition is on. I chose the connector just left of the yellow 20A fuse in the lower left of the fuse block. On my ’95 YJ, this slot is even labeled “CRUISE”. Just strip the end of the red wire and crimp it into the flat spade connector provided with the kit, then push the spade into the fuse block. [8W-10-1, 8W-10-8]
One of the hardest parts of the install was wiring up the brake switch. It’s dark & cramped up under the dash by the steering column, and I hear it’s even worse if you have air conditioning. The brown wire from the kit must be spliced onto the solid pink wire from the brake switch. The purple wire must be spliced onto the solid white wire. The wire colors here differ from what my service manual specifies, but this setup seems to work just fine. [5-32, 8W-51-3]
The remaining wires all get plugged into the “user interface” box that you put on your dash. I shoved the excess wire up under the dash and secured it where necessary with zip ties & electrical tape.
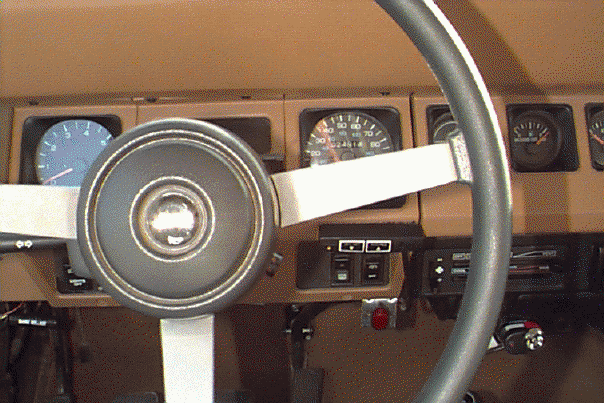
Placement of the controller box is a little tricky in a YJ. One good spot is on the narrow vertical edge below either the tachometer of speedometer. Since the controller box doesn’t look terribly waterproof & I have my top off six months of the year, I avoided mounting it on the left side of the wheel. I’ve currently got it velcroed to just under the speedometer & above the rear wiper/defroster switches. This is a convenient place, but offers little protection from precipitation. I may move it to the bottom edge of the dash just under the wiper/defroster switches. A right-angle mounting bracket is provided for this purpose.
Once I was sure everything worked well, the final step was to clean up the installation. I made sure all wires were neatly secured where they wouldn’t get in the way of anything else, trimmed the vacuum line down to a reasonable length (about half of what was supplied), and bolted the servo to the fender well. This is where the 7/32″ drill comes in. I’d suggest putting some primer or something on the raw metal that the saw leaves, since an unprotected fender well is a prime candidate for rust. I also recommend putting the bolt head on the bottom of the fender well with the nut and bolt end inside the engine compartment. This will produce the smallest obstacle if your tires end up rubbing in that area.
I’m pretty happy with the performance. In fourth gear, it can hold 60 mph up the steepest hills around my home. It has trouble holding 65+ up those hills in fifth gear, even though I can do it by stomping on the gas myself (I’ve got a 2.5L manual, BTW). A vacuum reserve canister (available directly from Equus) would probably help clear up that problem, but I won’t bother with that just now. On mild-to-moderate hills, the speed fluctuates by a few mph. It’s a bit more jerky than the factory unit in my wife’s Honda Accord, but I guess that’s to be expected. All in all, it was $70 well spent.
I had a chance for an extended test run when we drove down to Manhattan, KS, for a weekend of wheeling. The unit was able to hold at least 65 mph most of the way, though it did fluctuate by three or four mph in hilly terrain. I also noticed that when setting or resuming the speed, it tended to accelerate by 1 or 2 mph over where I wanted it. A vacuum reserve canister might be in order after all, but I’ll give it a good test along the interstate before I decide for sure.
Many thanks to Christopher Smith and David Rush, both of whom installed this same unit in their Jeeps (4.0L TJ & 4.0L YJ, respectively) shortly before I did. Without their input, I would no doubt have lost much hair (not that you’d notice).
Since I frequently get questions about the Equus setup or requests for copies of the manual, I finally decided to scan it and post it here on the web. Click here for the online Equus manual.
[Last updated 9 October 2002]


