
 After I rebuilt the engine in my ’77 Wag and finally started driving it around (including one trip flat towing my YJ to Kansas, I realized that the steering wandered quite easily. I knew the steering box & all the joints were tight, since the steering wheel wandered right along with the tires. I disconnected one end of the original factory steering stabilizer and found that it offered very little resistance. Time for a new one.
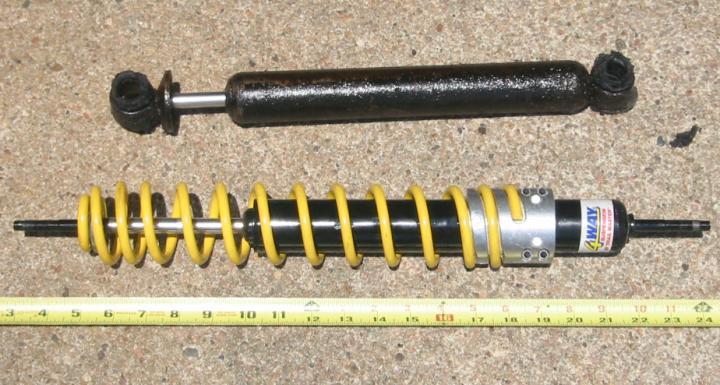
Old and new
Since I planned to use my Wag for towing, I wanted the steering to be as stable as possible. I’d heard good things from people about the Trailmaster 4-Way steering stabilizer, which looks like a coil-over shock. Part 59201 for 1970-86 FSJ’s is different than the newer Jeeps, so I had to special order it for about $90 — about double what you’d pay for a cheap factory replacement stabilizer at the corner parts store.
About two weeks after my order, it came in. I was a bit disappointed to find that one of the U-bolts (for attaching the mounting brackets to the axle) was missing, the the other three were all too big to fit into the holes in the brackets. Rather than hassle Trailmaster to send me new ones, I just spend $3.75 at a local suspension shop to buy a new U-joint and have the other three bent to the correct shape.

Axle bracket
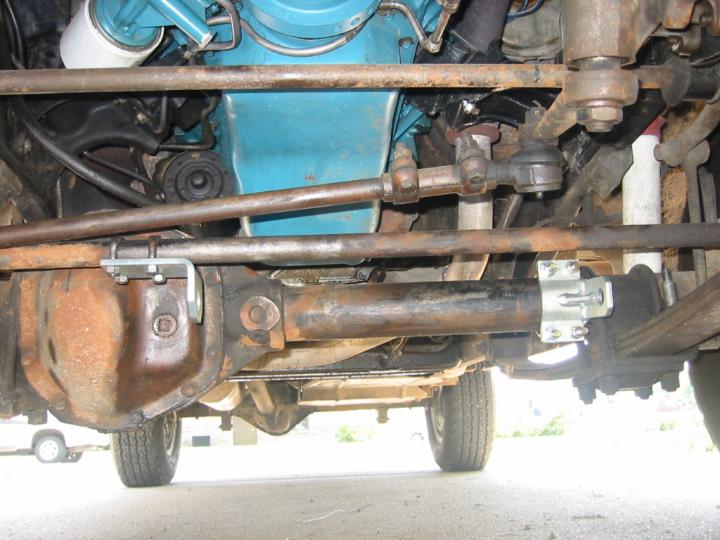
The install was straightforward. First, remove the old stabilizer. One end is attached to a bracket on the axle that is sandwiched between the spring perch and the leaf springs. I just left that bracket in place & removed the stabilizer from the bracket. It’s held with a single 3/4″ nut. The other end of the stabilizer is attached to a bracket (again with a 3/4″ nut), and that bracket is clamped to the tie rod with two U-bolts. The U-bolt nuts are 1/2″. I removed the entire factory bracket from the tie rod.
Both brackets
To make the parts more generic, the Trailmaster stabilizer has a threaded stud at each end and comes with its own brackets to mount it to a variety of axles. I bolted up both brackets first, making them snug, but still loose enough that I could move the bracket by hand. Remember how I said that the U-bolts Trailmaster sent me were the wrong size? Well, the U-bolts that held on the factory tie rod bracket happened to fit the Trailmaster bracket perfectly, so I used those instead.
Ground clearance
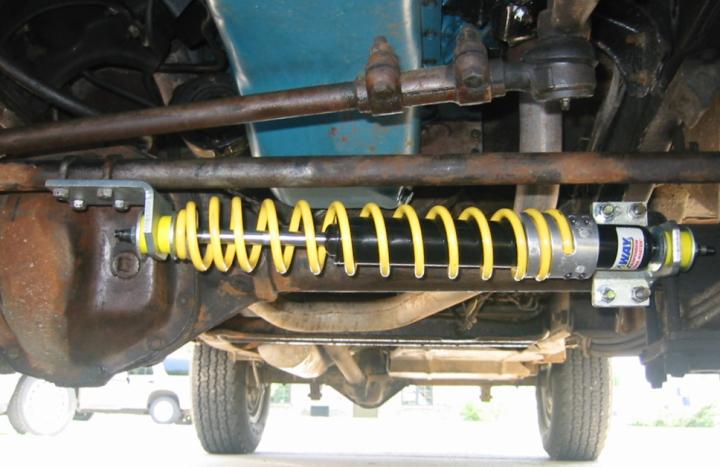
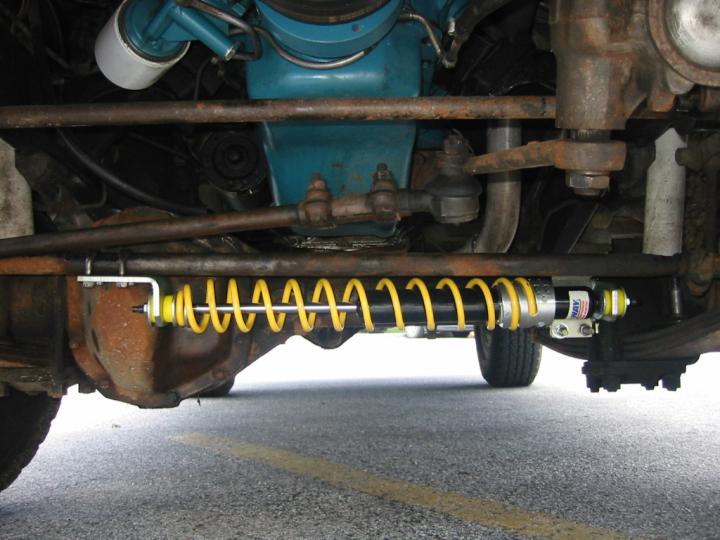
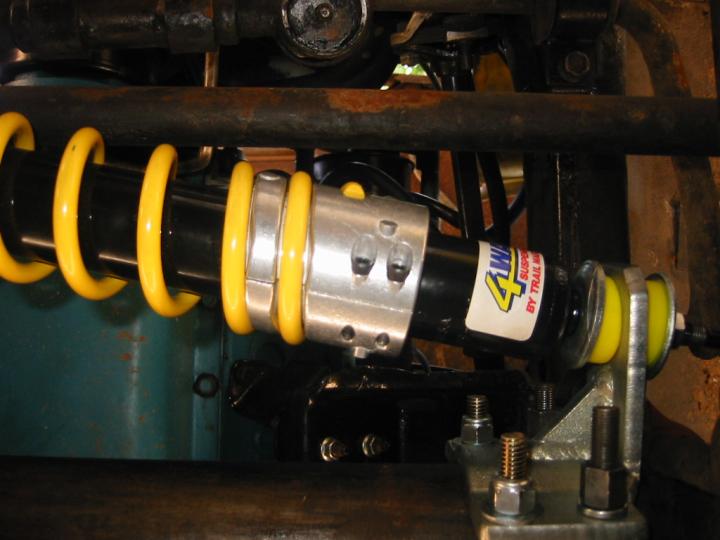
To help with clearance, put the axle bracket as close to the leaf springs as possible. The instructions say to point this bracket straight forward, but I had to point mine downward just a hair to keep the tie rod from hitting the top of the coil at full turn lock. That makes the stabilizer the lowest object at that spot under my axle tube, but since this Jeep isn’t a trail rig, that shouldn’t be a problem for me.

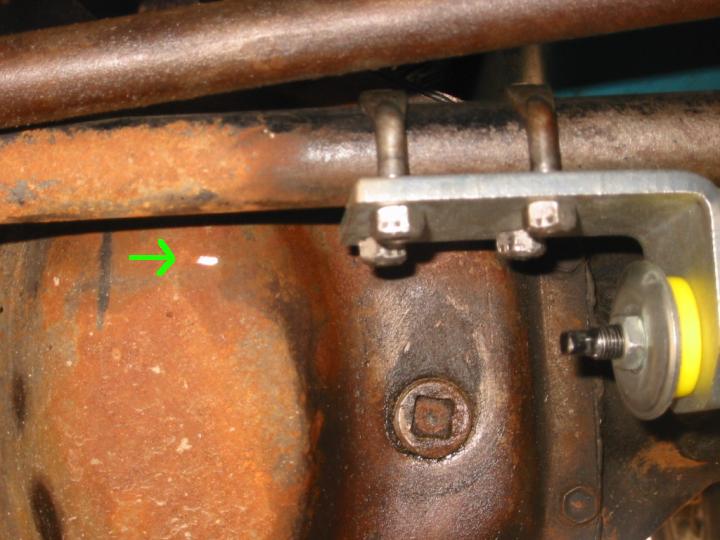
Contact with differential
The instructions say that, in order to avoid hitting the diff cover on most vehicles, the tie rod bracket should be pointed downward from the tie rod. This is the case for the FSJ. When pointed downward with the stabilizer hooked up, the bracket just barely kisses the diff cover at full right turn lock. It hits hard enough to scrape the rust off my diff cover & leave a small, shiny scratch, but I don’t think it noticeably affects my turning radius.
If you haven’t already done so, make sure the front wheels on your vehicle are pointed straight forward.
Before you tighten up the tie rod bracket, you’ll have to install the stabilizer to the brackets. Slip a steel disk and a bushing onto each stud, slip the studs into the holes in the brackets, and then slip on another bushing, another disk, and a nut. As you start to tighten down the nuts, you’ll realize that the stabilizer isn’t quite parallel with the tie rod. While this isn’t a problem with the eye-style factory stabilizer, it does tend to deform the bushings on the stud-style Trailmaster stabilizer. I doubt this is a problem, but it does make one wonder how tight to make the nuts. The included instructions don’t mention this.


Because the stabilizer isn’t parallel to the tie rod, it will try to rotate the tie rod bracket toward the rear of the tie rod as you tighten the stabilizer attaching nuts. Once those nuts are tight and you’ve made sure that your wheels are pointed straight forward, it’s time to tighten the U-bolts that hold the brackets to the axle and tie rod. The axle bracket is easy. On the tie rod bracket, you’ll have to make sure that the bracket is pointed straight down from the tie rod as you tighten the U-bolts.
On the initial test drive, I seemed to notice slightly better return-to-center with the new stabilizer. Remember that this is in comparison to a 26-yr-old, dead stabilizer, not to a brand new new factory replacement stabilizer. Improved return-to-center is one of the advertised features of these coil-over stabilizers. Unfortunately, any improvement in steering tightness was barely perceptible. When flat towing my YJ on the highway the next weekend, steering in a strong wind was still pretty squirrelly. It looks like I’ve got some other steering gremlins to hunt down. My old stabilizer was definitely shot, though, so my new stabilizer wasn’t wasted money.
I later discovered that my left lower ball joint was bad, which explains why my steering was so bad and why the new stabilizer didn’t help any. Replacing the ball joints and tightening up the steering box a little more helped the steering immensely.