Replacing a Dana 30 Wheel Hub Bearing
Wheel bearings wear out. It's a fact of life. When my Wrangler reached its 15th birthday, I was starting to hear an occasional scraping noise when I'd drive at 40 mph. I eventually realized that it was probably the front left unit bearing, the combination hub and wheel bearing that Jeep YJ, TJ, and XJ (Cherokee) D30's use. Replacements cost about $80 for cheap brands or $130 for expensive brands. You can replace it in your driveway using common tools in less than an hour. Here's how.
|
Is this too much wheel play? |
Should my wheel sound like this? |
The order of events here can vary depending on the tools you have available and how frozen some of the parts are. I have a nice impact wrench, and this isn't the first time I've removed my wheel bearing, so everything came apart quite easily.
I have aftermarket wheels with no hub caps, so I was able to remove the hub nut without removing the tire & wheel. You'll see why shortly. If you have hub caps which hide the hub nut, you'll have to remove the tire first. In that case, you should remove the brake caliper while you're at it. See below for instructions if needed.
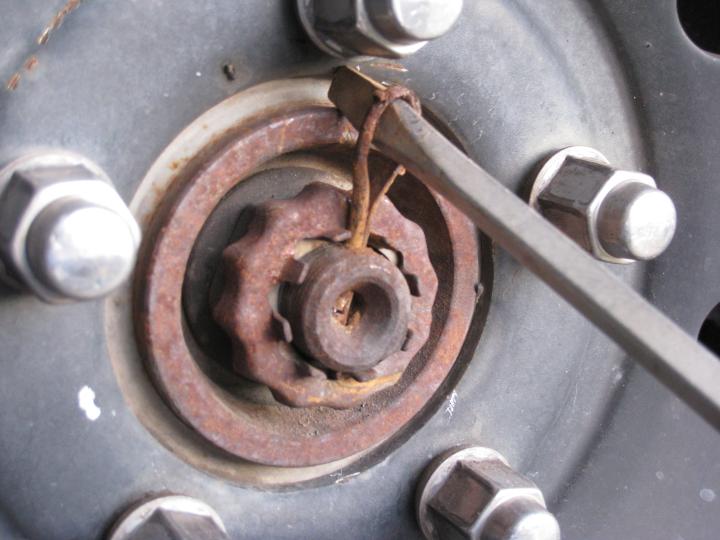
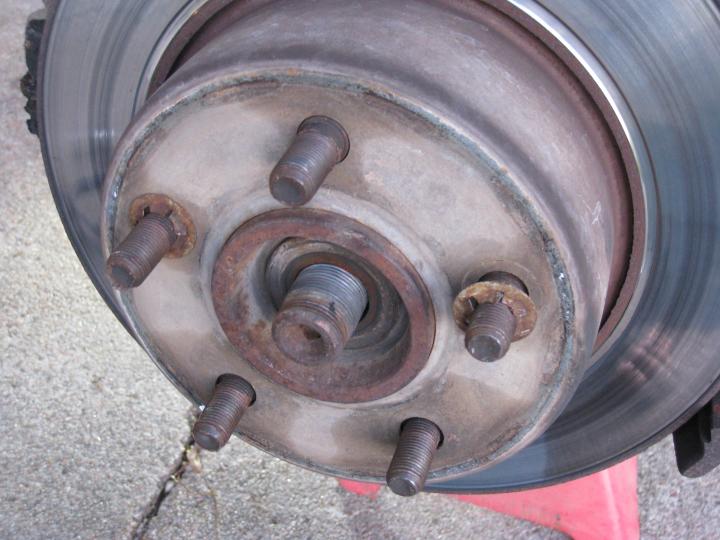
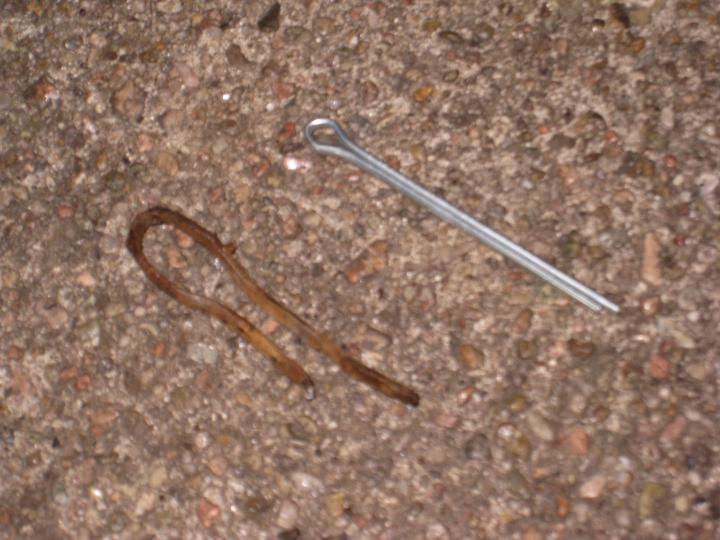
Pull the cotter pin from the outer end of the axle shaft and remove the protective nut cover and spring washer. The hub nut itself is 36mm, which is larger than most home mechanics have on hand unless they've done this job before. It's the only nut of that size on my YJ, and that socket is the largest metric one I own.

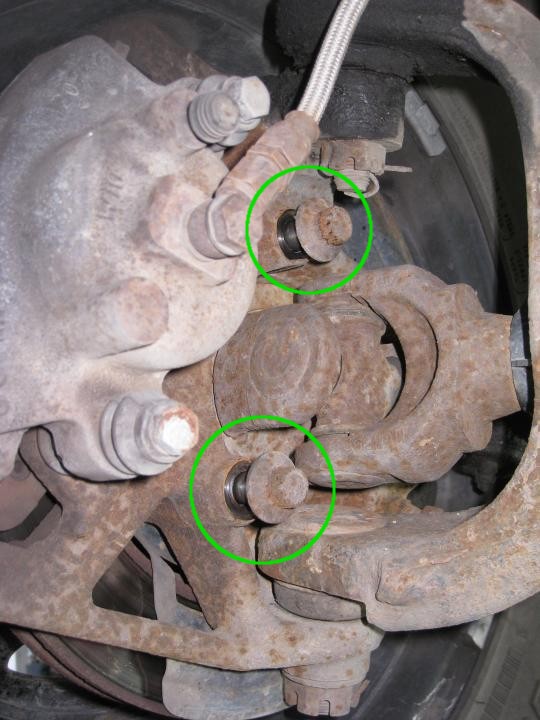
There are three bolts with 13mm, 12-point heads that go in through the inner side of the knuckle and hole the unit bearing in place -- One each above, in front of, and behind the axle U-joint. Loosen each of them so that there's a 1/2" (12mm) gap between the head and the knuckle, but don't go so far as to completely free the threads from the bearing. We'll need them attached for a safety net later. Access to these bolt heads is much easier if you turn the steering wheel to one side of the other so that your wrench can get in past the knuckle. I do this after jacking up the front end.

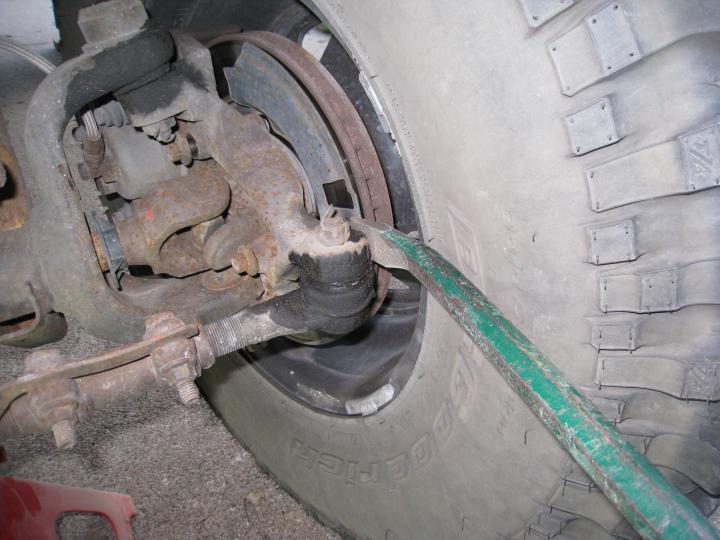
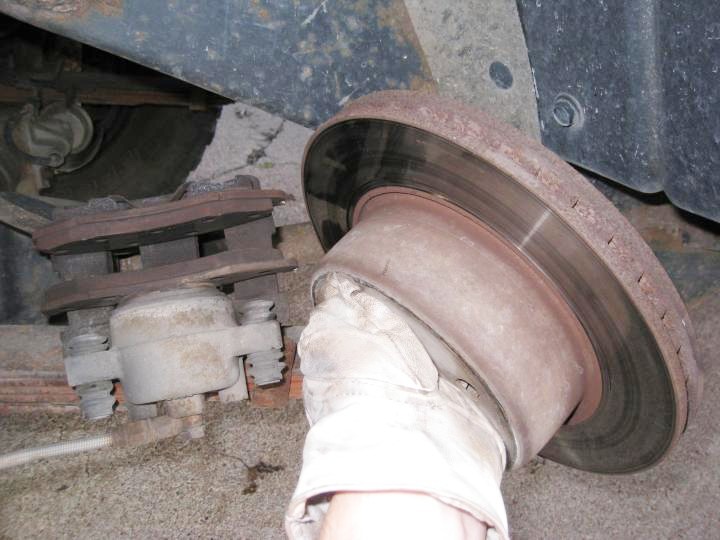
If you haven't done so yet, chock the tires, raise the front wheel off the ground, and support the axle with a sturdy jack stand. With the wheel securely bolted to the lug nuts, brace a pry bar against the end of the steering knuckle and the tire, and push the tire outward. If this is the first time you've done this, it may take some force. The wheel is bolted to the wheel bearing, you're using the tire to pry the bearing out of the knuckle. Watch the head of the frontmost 12-point bolt to check your progress. When the bolt head is significantly closer to the knuckle than it started, you've got a good gap between the bearing and the knuckle. We left those bolts loosely attached so that if your bearing pops out too fast, it won't fall on the ground.
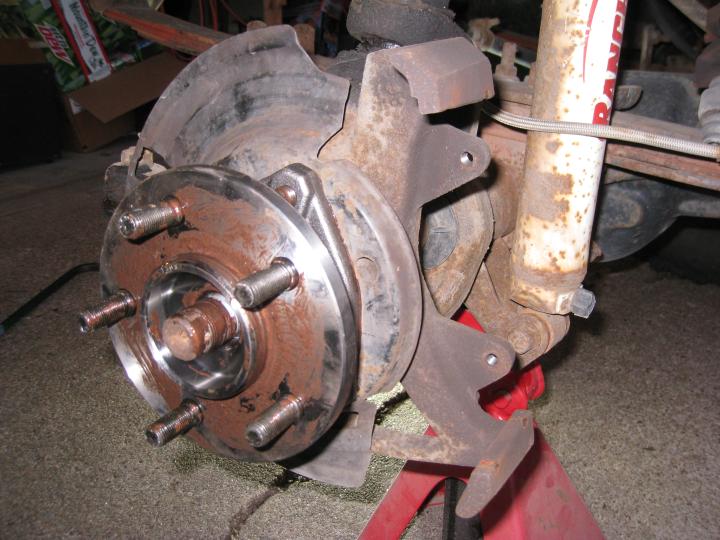
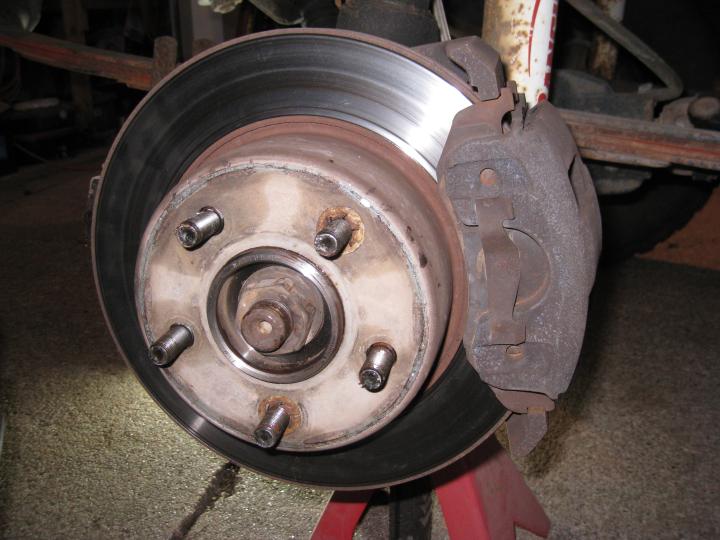
You can now remove the wheel/tire and then the brake caliper. If you had to remove the tire earlier in order to get access to the hub nut, you should have removed the brake caliper at that time. The caliper is attached with 13mm-head bolts (6-point this time) that enter from the back of the caliper. Slide them out of their sleeves. Once free, pry the top of the caliper rearward away from rotor, using the bottom of the caliper as a fulcrum. Eventually, the bottom will pop off as well. Don't let the caliper drop or hang from the brake hose! Carefully set the caliper up on your leaf spring (if so equipped) or zip tie it out of the way. Remove the press washers on your lug nuts using needle nose pliers to bend the tabs out. Next, remove the brake rotor. If this is the first time your rotor has been off, it may be rusted in place. A heavy, metal hammer (not a dead blow) will help jar it free. Clean off any brake dust that may exist. This is a good time to check the condition of your brake pads and rotor.

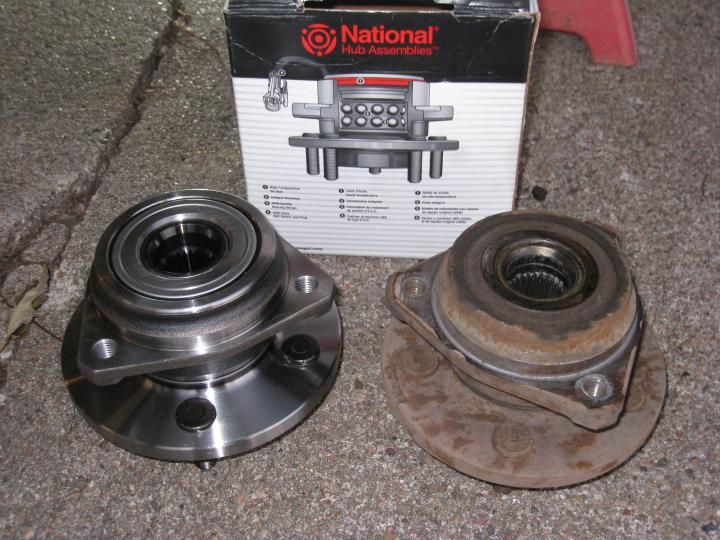
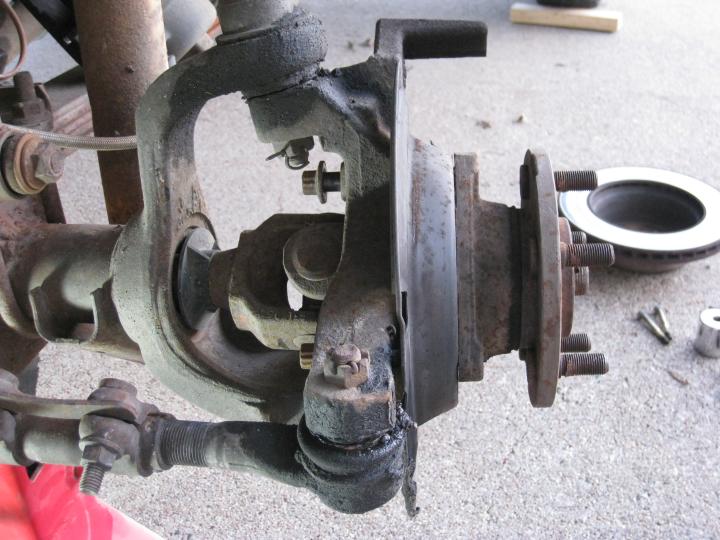
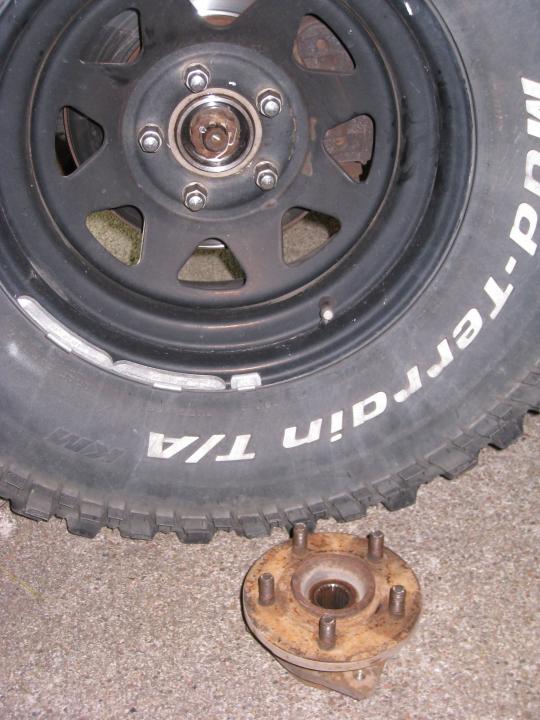
With the wheel and brake parts out of the way, you can finally see the hub assembly. It's press fit into a cavity in the steering knuckle. The pry bar you used earlier should have created a decent gap between the mating surfaces of the knuckle and bearing. If your bearing is shot, you can completely unscrew those 12-point bolts from the bearing and let the bearing fall where it may. If you're dismantling your axle for some other reason (like to remove the axle shaft) and you need to keep your bearing for reassembly, then try not to let it drop onto a hard driveway. You should be able to use a large screwdriver or small pry bar to completely remove the hub from the knuckle. Since I had used antiseize between the hub and knuckle the last time I reassembled it eight years ago, mine pulled out very easily.


|
This is what the old hub sounds like: |
This is what the new hub sounds like: |
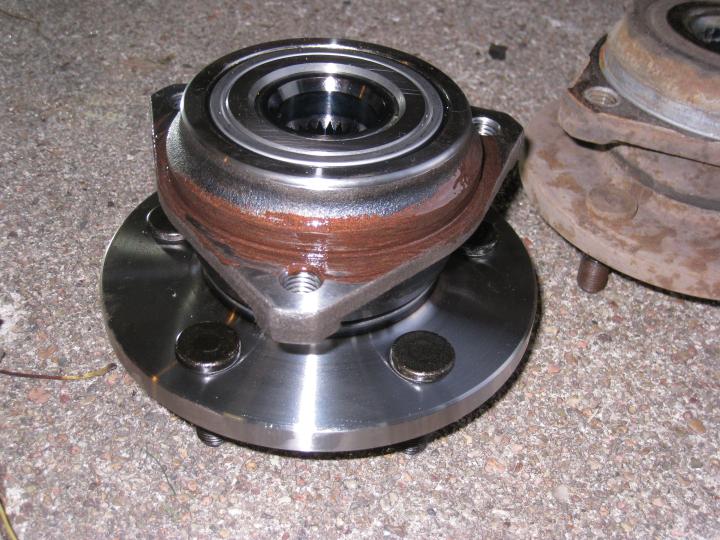
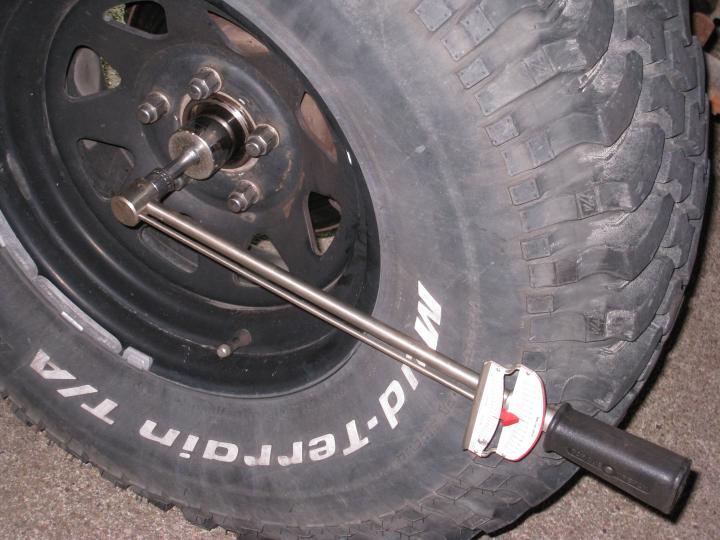
That's it; now reassemble everything. Be sure to use antiseize on all threaded and press-fit surfaces, as well as between the hub and rotor. This will prevent the parts from rusting together, and make disassembly a whole lot easier next time. The 12-point washers on the back side of the knuckle should be tightened to 75 ft-lbs. The brake caliper bolts should just be "good and tight." The hub nut should be 175 ft-lbs, which was higher than my 150 ft-lb torque wrench could measure. I just maxxed it out and then added a bit. You'll probably have to install the tire and lower it to the ground in order to torque that hub nut. Also, please make sure your cotter pin is in good shape. They're cheap, so a new one is probably in order.
Do you like this site?
Help me keep it going by throwing a few pennies my direction.
![]()
![]()
![]()
![]()
created 27 Sept 2010
last updated 29 Aug 2011 Obi-Wan (obiwan@jedi.com)
Links on this page to Amazon are part of an affiliate program that helps keep Jedi.com operational. Thank you for your support!
