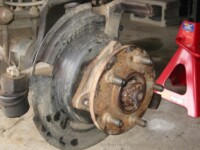
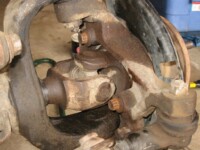
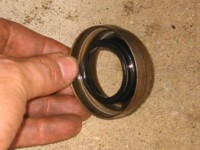
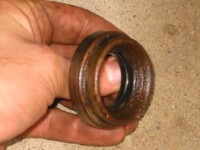
The left front axle on my ’95 YJ had been leaking gear oil out the tube and onto the lower inner knuckle every time I drove it for the last several months. Later on, it was bad enough that it would run down the inner tire sidewall and leave a puddle on the ground when I parked on an off-camber spot. If gear oil can get out, then water & mud can also get in, which means bad things for the gears in the pumpkin. I finally replaced the seal in September 2002. Here’s a few pointers.
The new seal only costs $10, but it took me a couple long evenings to get it replaced. This is one of those labor-intensive jobs that professional mechanics love to do for you. Here’s the short version of the instructions:
- Support the vehicle with both front wheels off the ground
- Remove the wheels and axle hub/seal assembly (more on this later)
- Remove the vacuum disconnect on the passenger side of the axle, if so equipped.
- Remove the differential cover & drain the fluid
- Remove the axle shafts
- Remove the gear carrier, being careful to mark the bearing caps and bearing races so they can be replaced in their original positions and orientations
- Remove the old seal, which sits just inside the axle tube where it meets the pumpkin, with a pry bar. It’s in there tight, so a big screwdriver probably won’t do it.
- Press the new seal into place (more on this later, too)
- Install everything you removed, in reverse order
Here’s a great trick for removing the hub/seal assembly that I learned in June (at Attica) and then got to make use of when I did this job just a couple months later.
With the wheel still bolted securely to the hub, remove the 36mm hub nut (see below). If you have hub caps (as the factory wheels did), then you’ll need to remove the wheel, remove the hub caps, and reinstall the wheel. Then loosen the three 13mm, 12-point bolts on the inner side of the knuckle that hold the hub to the outer knuckle assembly. Turn them all out 1/8 – 3/16″. BTW, turning the steering wheel side to side may help with clearance to these bolts — you’ll definitely need a breaker bar and PB Blaster to get them loose. Once these bolts are loose (but still attached) and the wheel’s securely bolted on, get a pry bar. Brace it behind something sturdy on the knuckle (like the steering arm) and then pry the wheel out away from the knuckle. Be careful not to bend your wheels when doing this, of course. Do this on both the front & back of the wheel until the bolt heads are noticeably closer to the knuckle than they were when you started. This means that your hub has been loosened from the knuckle, and complete removal should now be easy. You can remove the wheel, brakes, and the three hub retaining bolts, then use a large screwdriver to pry the hub the rest of the way out of the knuckle. No gear puller or slide hammer necessary.
I needed to use a torch to heat up the 36mm hub nut before I could remove it. It’s put on with 175 ft-lbs of torque, and its location allows it to get very corroded. Some PB Blaster and a minute or two of heat allowed me to break it free with an 18″ breaker bar. Before the torch, my 600 ft-lb impact wrench couldn’t even budge it.
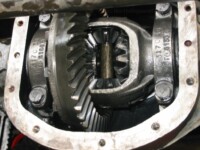
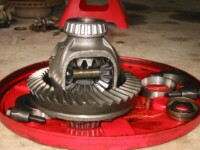
Differential carriers are installed with some side-to-side preload (well, except for my Dana 35), so removing the carrier from the diff housing can sometimes be a chore. I was able to pry mine out by putting a pry bar inside the ring gear and levering it out against the side of the diff housing. The bearing races will fall loose when it comes out, so be careful not to mix them up side-to-side.
After you pull the axle shafts, carrier, and old seal, clean out the axle tubes while they’re empty. An awful lot of crud builds up in there. I did this using a length of threaded rod with the hub nut washer (which is quite large & thick) held in place with several smaller washers & a nut. I used that contraption to scrape the crud out of the axle tubes into the knuckles. The tubes don’t need to be spotless, just free of the major crud buildup.
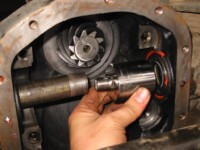
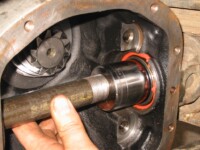
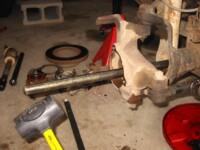
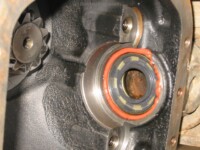
My old seal didn’t look bad, but it was obviously leaking, so I knew it had to be replaced. Pressing the new seal in while keeping it perfectly straight and not buggering it up took some ingenuity. By luck, I found that the Craftsman 36mm socket that I used to remove the hub nuts would fit perfectly inside the recession on the inner side of the seal. I had a 5′ length of 3/4″ pipe in my garage (part of a pipe clamp), which was the perfect length and diameter to stick in through the passenger side knuckle, down the axle tube, and into the pumpkin. I put a 3/4-to-1/2″ socket drive adapter in the top of the socket to locate it inside the end of the pipe. Viola! I now had a really long driver that would put equal pressure around the entire seal while I hammered on the other end of the pipe (sticking out the passenger side knuckle) with a 3-lb dead blow hammer. Strike lightly at first until you get the seal seated squarely, but once it’s in, I had to beat on the pipe pretty hard to get the seal fully inserted into its spot. When you’re feeding the pipe into the axle tube and while you’re striking it with the hammer, be careful not to bugger up the other axle seal, which is just outboard of the vacuum disconnect housing on axles that have such a thing. Coat the “business” surface of the seal with a light coat of oil before you insert the axle shaft. You don’t want it to run dry.
Once the seal’s in place, you can clean out the inside of the pumpkin with carb/brake cleaner, if you haven’t already done so. You really don’t want any dirt in there.
Reinstalling the carrier without a case spreader was possibly the most difficult part of this job. You have to snake the carrier/bearing race assembly past the tie rod and into the pumpkin, then get it all lined up just right so you can hammer it into place. Use a soft-surfaced hammer (rubber, brass, lead, etc) to do this, since you don’t want to damage the carrier, gears, or bearings. Remember the sideways preload that made the carrier difficult to remove? well, it makes a whole lot harder to insert. No real tricks here. Just make sure the carrier & races are lined up squarely before you start hammering. Tap softly until you’re sure that both races are starting to go into the proper spots, then hammer harder. It has to go in straight, not one side at a time. When you reinstall the bearing caps, make sure that they not only go onto the correct side, but that you don’t flip them upside down, either. They should be stamped with a letter on each cap, with the same letter at the same orientation also stamped onto the front surface of the diff housing.
Before installing the wheel hub/seal assemblies, use a wire brush to remove as much surface corrosion as possible. If your axle shafts stuck to the hubs when you removed them, I’d recommend that you find a 3-jaw puller and press the shaft out of the hub before you put everything back together. You may have to separate them on the trail someday, and if you leave them stuck together now, it’ll only get harder to do as time goes by. Coat the axle splines and the hub seal surface with bearing grease. Put a coat of anti-seize on all the bolt threads and especially along the mating surface where the hub presses into the knuckle. You’ll thank yourself for that the next time you have to remove the hub.
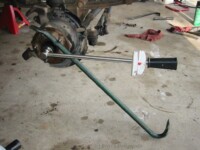
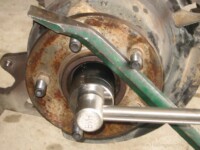
The hub retaining bolts want to be torqued to 75 ft-lbs. No problem there. The 36mm hub bolt wants 175 ft-lbs. Considering what could happen if any of these came loose, I highly recommend getting as close to these specs as possible. If you don’t have a torque wrench, get one. I recommend having two — a big one for up to 250 ft-lbs, and a smaller one (75 ft-lbs max) that can measure smaller values more accurately. Torquing the hub nut with the wheel off can be tricky. I took a 3-foot pry bar and wedged it between two of the wheel lugs so that the bar hit the ground and kept the hub from turning when I torqued the hub nut. In retrospect, it might have been easier to just snug the bolt up, then install the wheels & lower the vehicle onto the wheels before torquing the hub nut. Again, that assumes you don’t have hub caps.
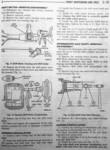
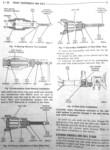
There are only two axle seals on the Dana 30. The left one, outboard of the differential, is described above. The right one is outboard of the vacuum disconnect motor. Gear oil is free to flow between the pumpkin and the disco. I’ve posted below copies below of the factory service manual pages that describe removing the vacuum disconnect and its associated seal.
Last updated 19 April 2012.
Do you like this site?
Help me keep it going by throwing a few pennies my direction.
![]()
![]()
![]()
![]()
Links on this page to Amazon are part of an affiliate program that helps keep Jedi.com operational.
Thank you for your support!

