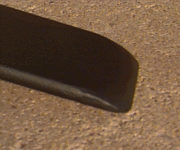
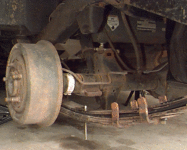
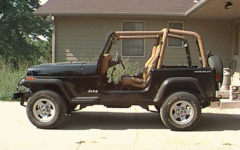
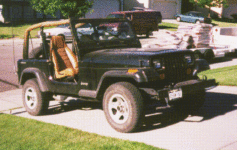
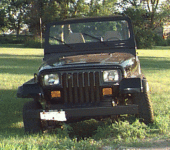
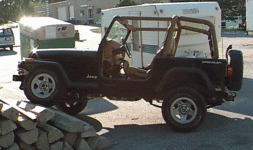
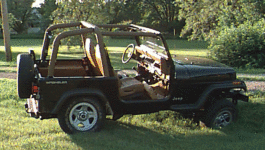
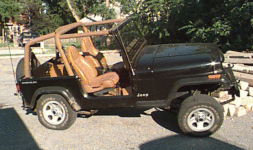
My ’95 YJ had the problem that whenever I load it up with all my wheeling/camping gear, the rear springs developed a pretty nasty negative arch. This was livable on the road, but sucked for wheeling. I finally decided I needed more support back there. I considered adding another stock main leaf to each rear pack, but I couldn’t find any stock packs at a reasonable price, and I wanted a wee bit of lift anyway. I decided to get two pair of Rubicon Express add-a-leaves (part RE1400). Unlike most add-a-leaf kits, RE’s version is a full-length leaf, sans spring eyes. This should provide some relief for my tired OEM main leaves when heavily loaded, and will also give about 1″ of lift to boot. I ordered four leaves & center pins on Thursday, and they arrived Monday morning for a total of US$161.
Let me first say that it’s amazing how much easier something like this is when you know what you’re doing. It took me four evenings and most of a day to do the rears. Once I’d gotten the system down, it took only a few hours to do the fronts.
I spent about 2.5 hrs on them the first night. I first had to remove all the adhesive from the duct tape that they were “packaged” in. Since the ends of each spring were just square-cut, 1/4″ thick metal, I chose to round the ends off a bit with a grinder so they’d be less likely to catch on stuff like rocks or my hands. A little black paint (which I ran out of after painting one side of each spring) to cover the raw metal and dress up the leaves, and they look great.
I also wanted to drill holes to mount those little Teflon pads to keep the leaves from rubbing. The pads weren’t included from RE, but I got them from a local suspension shop for $0.65 each. My 1/8″ pilot hole went through just fine, but bigger bits would just sit & spin when I used my hand drill at high speed. I finally bought a 1/2″ cobalt drill bit and some cutting oil, repaired my dad’s dysfunctional drill press, and (on the advice of the suspension shop) set it up to spin at only 250 RPM. With a little bit of patience, that finally did the trick. This should ideally be done before you paint the leaves, of course.
Both of those first steps, which took me about two full evenings, are optional, but I wanted to do a professional job from the outset. Besides, we weren’t scheduled to leave for our 4th of July wheeling trip for another few days yet…
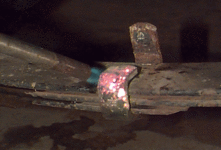
The next step is to straighten out the C-clamps that hold the existing spring pack together to keep the springs from fanning out sideways. It was rumored the factory configuration limits articulation by holding the leaves together vertically, but I found that not to be the case when I maxed out my articulation. Regardless, I chose not to bother bending the ends back over after making room for the additional leaf. The resulting U-shaped clamp should do the intended job without fear of limiting my articulation. The clamps are pretty sturdy, so you’ll need to heat them up with a torch in order to bend them with a pry bar and vice grips. You don’t need to remove the springs from the vehicle to do this, but I removed the rears anyway because using a torch that close to the gas tank made me nervous. You’ll need to remove the wheel in order to get a good angle to pry on the clamps.
My ’95 had Teflon pads lining the clamps. I could have re-used them if I’d re-bent the clamps afterward, but I would have had to dismantle the entire spring pack to get them off the clamps, then reassemble the pack to bend the clamps straight, then disassemble it again to put the new leaf in. This seemed like overkill to me, so I just cut them off with a screwdriver and hammer. Besides, they won’t fit on my new U-shaped configuration anyway. Don’t just burn them off — it’s rumored that burning Teflon is toxic.
I found that mapp-gas (methylacetylene) heats up the clamps much faster than does propane. It took a minute or so under the torch to get one side of the clamp glowing orange. Once that’s done, you’ve got maybe 10-15 seconds to bend the clamp straight with a pry bar and vice grips before the clamp cools off again. The extreme heat involved will also tend to melt the Teflon pads at the end of each leaf, which is bad. I prevented this by squirting water on the pads before & during the heating process. After bending up one side of a clamp, I allowed it to cool down while I switched to another spring pack.
Once the clamps are straight, it’s time to unfasten the spring mount U-bolts and prop the axle up out of the way. This will be easier if you spray all affected bolts with PB Blaster, Liquid Wrench, WD-40, or similar for several days before you begin wrenching. If you want to drop the shackle end of the springs, you’ll want to disconnect the axle before that. It’s easier to reassemble the leaf pack after you bolt the main leaf back into the shackle first. (This is a good time to reverse the lower shackle bolt so that the nut, not the bolt head, is closest to the gas tank.) Be sure to clamp the leaf pack together before you unscrew the center pin, otherwise all the lower leaves will fall onto your hand when the nut comes free. If you’ve got the time, this would be a good time to coat your leaves with POR-15 or at least a fresh coat of paint to ward off rust.
The RE kit comes with new center pins, but they’re nearly three times as long as the stock pins. (See U-clamp photo above.) I had to cut two inches off the end of each one so they wouldn’t get hung up on rocks after reassembly. This is most easily done before you reassemble the leaf pack. Reassembling the leaf pack is the only part of the process where I actually needed three hands. My wonderful wife helped hold the pack in place while lifting each smaller leaf up onto the dangling center pin. I couldn’t find a torque spec for the center pin bolt, but it should be tight. One of mine came loose after I’d but the U-bolts back on, so rather than dismantle everything to fix it, I used needle-nose pliers and Loc-tite to screw the nut back in place. We’ll see if it stays.
According to the factory service manual, the U-bolts should be torqued to 52 ft-lbs, and the shackle bolts should be torqued to 80 ft-lbs. After a few days of driving, you should double check all your nuts to make sure they’re tight. I’ll reiterate what the FSM states in bold print: don’t tighten the spring & shackle bolts until the Jeep is back on the ground and resting on all fours. If you tighten them down while the tires are hanging unsprung, you’ll hear lots of squeaking from the bushings whenever the springs have to flex upwards.
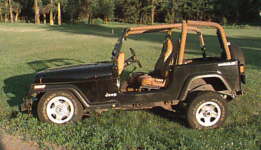
When I first dropped the Jeep off the jack stands, the lift measured at each fender flare varied between 2-2.5″ per corner. When I first pulled off the driveway, the back end felt like there were no springs at all. After about a five minute test drive with lots of stops, starts, and harder-than-normal corners, the springs softened up a little, and the lift had leveled out to 1.75″ per corner. Several days and 25 miles later, the suspension is much softer, but it’s still noticeably harder than stock, especially in the rear. When fully loaded for a wheeling trip, the suspension feels awesome, even on the road. On the trail, you’d never know you were heavily loaded. I’m hoping it’ll soften out some more after I unload all my gear from the trip. If the rough ride bothers you and you really don’t need the lift, you might want to go with a second main leaf from a used spring pack instead of a lift leaf.
One thing I noticed when reattaching the rear axle to the spring pack is that the OEM shocks are now limiting factor for rear axle droop. They could stand to be about 2″ longer with these lift leaves. As one might expect, the additional leaf hurt my wheel travel. The front wheels dropped from 9.5″ to 8.5″, while the rear wheels dropped from 9″ to 7.5″. The rear travel would probably be closer to 10″ if the shocks were long enough. While both ends hit the bump stops under full compression before the lift, neither end hits now. Still, I think the added undercarriage height and load capacity will add more to my off-road ability than the decreased articulation will detract.
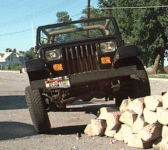
By measuring the front wheel height during the photo session on the right and then doing a little math, I figure the new suspension would have an RTI of around 450 on a 20-degree ramp. Since I lost an inch of travel at each end, the original suspension (sans sway bar and rear track bar) probably ramped around 500-520.
Here’s the measurements before the lift and a few days after installation:
| Location | Before | After | |
|---|---|---|---|
| Sitting level | |||
| Front left flare | 30" | 31.5" |
|
| Front right flare | 30" | 31.5" |
|
| Rear left flare | 32" | 33.5" |
|
| Rear right flare | 32" | 33.5" |
|
| Max compression |
|||
| Front left | fender to tire top | 0.5" | 2" |
| fender to wheel center | 14" | 15.5" |
|
| Rear right | fender to tire top | 2" | 3.5" |
| fender to wheel center | 15.5" | 17" |
|
| Max droop |
|||
| Front right | fender to tire top | 10" | 10.5" |
| fender to wheel center | 25" | 25.5" |
|
| Rear left | fender to tire top | 11" | 11" |
| fender to wheel center | 26" | 26" |
|
| Before | After |
|---|---|
About three months after installing the leaves, I finally broke down and got longer rear shocks. The ride with the stock shocks was ridiculously harsh over speed bumps and such because the shocks weren’t allowing the normal bouncing motion. I disconnected the bottom of the rear shocks, maxed out my articulation, and measured the length I needed for the new shocks. I found that the most length was required not when cross-axled, but when the rear end was hanging from my Hi-Lift jack with both wheels in the air. The minimum length required (with no load, mind you) was 15″. The maximum length was 20″. I know the rear end sits quite a bit lower when heavily-loaded, so I chose 13.5″ and 20″ as my required lengths. For reference, the stock shocks I removed stretched from 12″ to 18.25″. (The stock front shocks are 17″ to 24.5″.) Since I didn’t know what vehicle might have come with shocks of this length, we spent some time hunting through the shock shelves at Parts America looking for something that would fit. I finally came away with two Monroe Gas-Matic Plus 37042MP’s for $26 apiece. They stretched from 13.5″ to 21″, which should work well.
When I went to install them, I ran into a couple problems. First, the upper shock eye on a stock YJ shock doesn’t have a metal sleeve inside the bushing. Rather than the 1/2″ eye/bushing that seems to be standard, the YJ upper mount uses a 5/8″ mounting pin and a harder rubber bushing with no sleeve. In order to get the new shocks to fit, I had to cut the metal sleeve into pieces with a hacksaw and pull it out with vice grips and PB Blaster. Of course, this caused the rubber bushing to shrink, leaving me with only a 3/8″ opening. To get it on the 5/8″ pin, I had to file the ends of the pin down so they had a slight angle, and then grease the pin and press the shock onto the pin with a C-clamp. Kind of a pain, but it worked. When I then went to mount the bottom eye, I found that the sleeve in the new shock was too wide for the mounting bracket. I had to cut off 1/16″ or so from each end of the sleeve to make it fit. This wasn’t nearly as much trouble as the upper mount.
The final result gives a much smoother ride (according to my wife, who never rode in it during the week between disconnecting the old shocks and finishing installing the new ones). It also gives better rear wheel travel, which should help my axle articulation. I’ve yet to measure it with the new shocks, but I’ll update this page when I do. The rear brake hose is now a little snug under full droop, but it’s not the only limiting factor, so I think I can live with it until I go SOA and install really long brake lines.
[Last updated 26 October 1998]
Do you like this site?
Help me keep it going by throwing a few pennies my direction.
![]()
![]()
![]()
![]()
Links on this page to Amazon are part of an affiliate program that helps keep Jedi.com operational.
Thank you for your support!


